Pool Flocculant vs. Clarifier: Best Choice for Stunning Water
March 26, 2026
Chlorine: Ultimate Organic vs. Inorganic Pool Choice
March 31, 2026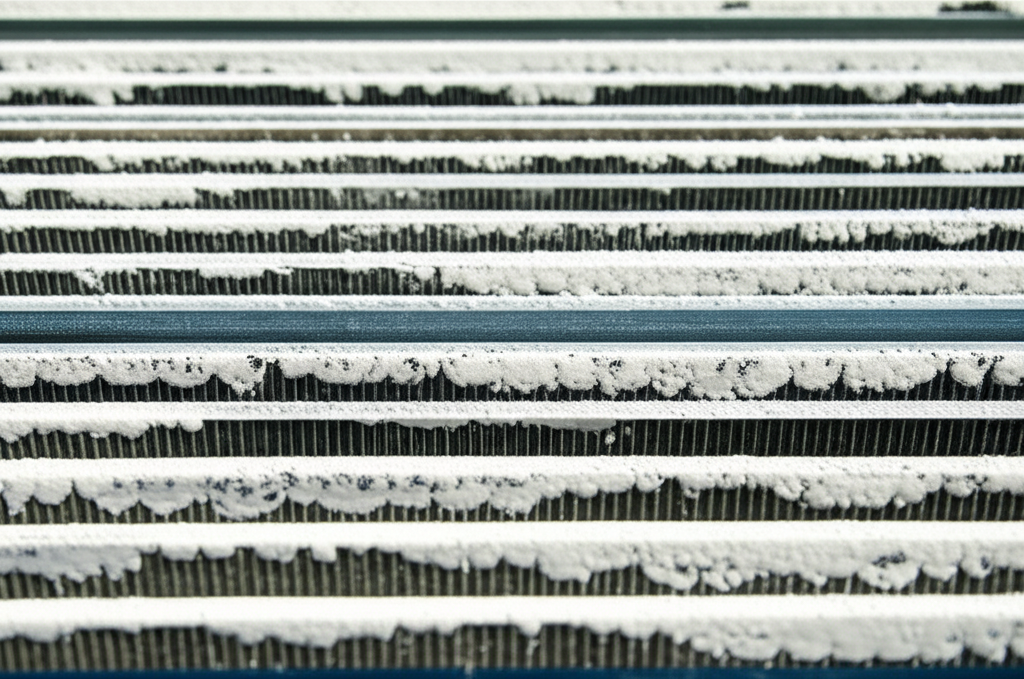
- Understanding Salt Cell Scaling: What It Is and Why It Happens
- The Detrimental Effects of Calcium Deposits on Your Salt Cell
- Identifying Salt Cell Scaling
- The Effortless Fix for Ugly Flakes: Cleaning Your Salt Cell
- Preventing Future Salt Cell Scaling and Calcium Deposits
Salt Cell Scaling: Those unsightly white, flaky crusts clinging to your pool’s salt cell can be more than just an aesthetic nuisance; they’re a clear indicator of diminished efficiency and potential long-term damage to your sanitization system. Often composed of hardened calcium deposits, salt cell scaling can severely impede your salt chlorinator’s ability to produce chlorine, turning your advanced purification system into an expensive ornament. The good news is that addressing this common pool problem is far simpler than many imagine, requiring only a few targeted steps to restore your cell to its pristine, powerful state.
Understanding Salt Cell Scaling: What It Is and Why It Happens
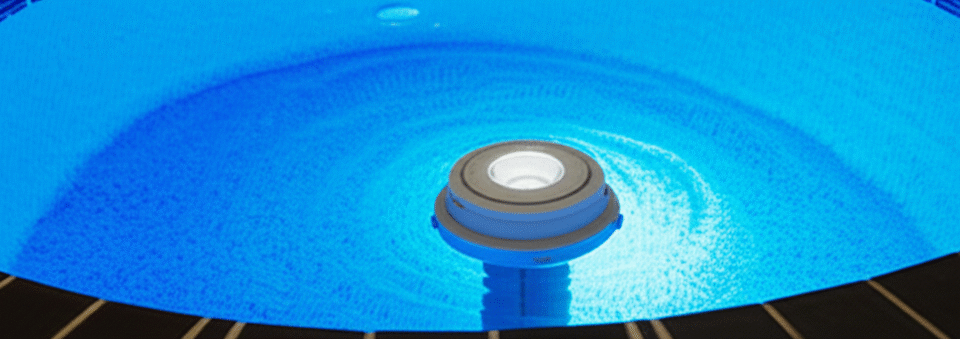
At its core, a salt chlorinator works by converting dissolved salt (sodium chloride) in your pool water into chlorine gas through a process called electrolysis. This chlorine gas then sanitizes your pool before reverting back to salt. The “salt cell” or electrolytic cell contains titanium plates coated with precious metals, which are responsible for facilitating this chemical reaction.
Salt Cell Scaling occurs when certain minerals in the water, primarily calcium, precipitate out of solution and adhere to these titanium plates. These hardened layers are essentially calcium deposits, identical to the “limescale” you might see in a kettle or showerhead. Several factors can contribute to the rapid formation of these deposits:
High Calcium Hardness: If your pool water has excessively high levels of dissolved calcium, the likelihood of scaling significantly increases.
High pH: When pH levels rise above the ideal range (7.4-7.6), water becomes more alkaline, encouraging calcium to “drop out” of solution and solidify.
High Total Alkalinity: Similar to pH, elevated alkalinity can create an environment conducive to scale formation.
High Water Temperature: Warmer water increases the rate at which minerals precipitate.
Improper Cell Operation: Running the cell at too high a setting for extended periods or neglecting proper water balance can exacerbate the problem.
When these factors combine, the tiny bubbles of chlorine gas produced by the cell can initiate and accelerate the attachment of calcium, leading to the gradual buildup of scaling on the cell plates.
The Detrimental Effects of Calcium Deposits on Your Salt Cell
While a little bit of scale might seem harmless, significant calcium deposits can have a cascade of negative effects on your pool’s salt chlorination system:
1. Reduced Chlorine Production: The primary and most immediate impact is a dramatic drop in chlorine output. The scale acts as an insulator, blocking the electrical current from reaching the titanium plates, thereby hindering the electrolysis process. This means your pool won’t be adequately sanitized, potentially leading to algae growth and cloudy water.
2. Increased Energy Consumption: To compensate for reduced efficiency, your system might try to work harder, drawing more power and increasing your electricity bill, often without achieving the desired chlorine levels.
3. Shortened Cell Lifespan: Continuous operation with heavy scaling puts undue stress on the cell’s components. The delicate metallic coating on the plates can be damaged by abrasive scale or aggressive cleaning methods used to remove it, significantly shortening the overall life of this expensive component.
4. System Error Messages: Many modern salt cells are equipped with sensors that detect flow or efficiency issues. Heavy scaling can trigger “check cell” or “low flow” warnings, even if other parameters are correct.
5. Impaired Water Circulation: In extreme cases, severe scaling can even impede water flow through the cell, further stressing your pump and filtration system.
Identifying Salt Cell Scaling
The most obvious sign of salt cell scaling is visual: you’ll see white or off-white, crusty deposits on the inside of the cell’s plates when you inspect it. Other indicators include:
Consistently low chlorine levels despite your salt reading being correct and the cell set to a high output.
Your pool water frequently appears cloudy or has signs of algae.
Your salt chlorinator displays warning lights or error messages related to the cell, even after checking other factors.
It’s a good practice to visually inspect your salt cell every 3-6 months, or more frequently if you live in an area with particularly hard water.
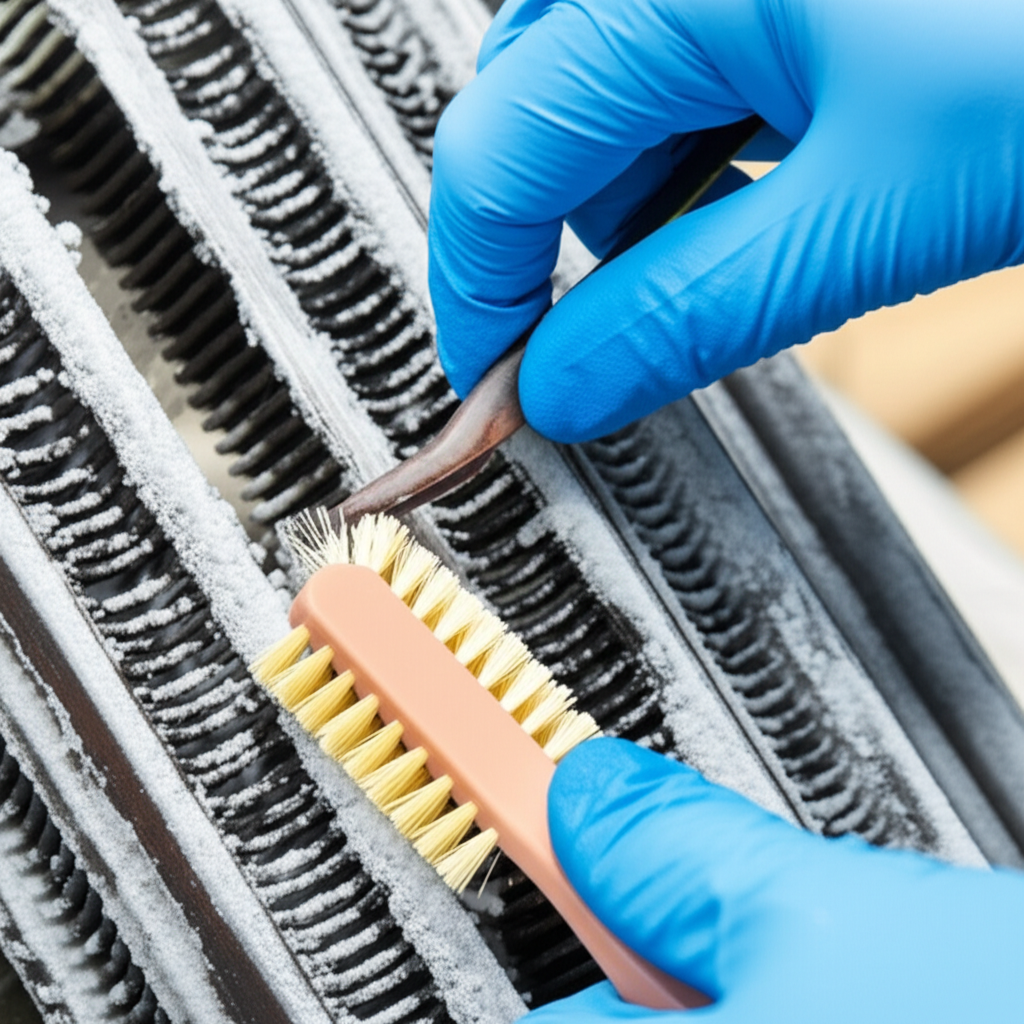
The Effortless Fix for Ugly Flakes: Cleaning Your Salt Cell
The most effective and “effortless” fix for existing calcium deposits on your salt cell is a gentle acid wash. This method leverages diluted muriatic acid to dissolve the mineral buildup without harming the cell’s delicate coating.
What You’ll Need:
Muriatic acid (available at pool supply stores or hardware stores)
A plastic bucket (dedicated for pool chemicals)
Rubber gloves and eye protection (safety first!)
A garden hose for rinsing
A plastic cleaning stand for the cell (some cells come with these; others can be sealed with a rubber stopper)
Step-by-Step Cleaning Process:
1. Safety First: Always wear rubber gloves and eye protection when handling muriatic acid. Work in a well-ventilated area outdoors.
2. Disconnect the Cell: Turn off your pool pump and the salt chlorinator system at the breaker. Disconnect the salt cell from the plumbing and power supply. Most cells have unions that unscrew easily.
3. Prepare the Acid Solution: In your plastic bucket, mix water and muriatic acid in a 4:1 or 5:1 ratio (4 to 5 parts water to 1 part acid). Always add acid to water, never water to acid, to prevent splashing and chemical reactions.
4. Seal and Submerge: Place the cell vertically in its cleaning stand or seal one end with a rubber stopper. Slowly pour the diluted acid solution into the cell until the plates are fully submerged.
5. Let it Soak: Allow the cell to soak for 10-15 minutes. You should see bubbling as the acid reacts with the calcium deposits. If the bubbling stops before the scale is gone, you may need to replace the solution. Avoid leaving the cell in acid for extended periods (no more than 30 minutes) as this can damage the precious metal coating. For stubborn scale, a very soft nylon brush can be used gently but typically isn’t necessary.
6. Rinse Thoroughly: Once the scale is gone, carefully pour the used acid solution into the bucket. Rinse the cell thoroughly, both inside and out, with a garden hose for several minutes. This is critical to remove all acid residue.
7. Reinstall and Recharge: Reconnect the cleaned salt cell to your pool plumbing and power supply. Turn on the pump and chlorinator. Monitor your chlorine levels and cell performance over the next few days.
Many modern salt cells also incorporate a self-cleaning feature that utilizes reverse polarity. This means the electrical charge on the plates periodically reverses, causing some scale to flake off. While helpful, it’s often not sufficient to completely prevent or remove heavy scaling, making manual acid washing a vital part of maintenance.
Preventing Future Salt Cell Scaling and Calcium Deposits
While cleaning is effective, prevention is always better. By maintaining proper water chemistry, you can significantly reduce the incidence of calcium deposits and prolong the life of your salt cell:
Balance Your Water Parameters Religiously:
pH: Maintain between 7.4-7.6 (ideal is 7.5). High pH is the biggest culprit for scale.
Total Alkalinity (TA): Keep between 80-120 ppm. This acts as a pH buffer.
Calcium Hardness (CH): Aim for 200-400 ppm. Levels above 400 ppm significantly increase scaling risk, especially with high pH.
Use a Scale Inhibitor: Regularly adding a sequestering agent (scale inhibitor) to your pool water can bind with minerals like calcium and magnesium, preventing them from precipitating out and forming scale. This is particularly recommended in hard water areas.
Regular Cell Inspection: Make it a habit to visually inspect your cell every few months. Catching scaling early makes cleaning much easier and faster.
Proper Cell Sizing and Run Times: Ensure your salt cell is appropriately sized for your pool volume and that you’re not consistently running it at excessively high output levels if not needed.
By proactively managing your pool’s water chemistry and performing periodic inspections and cleanings, you can banish the ugly flakes of calcium deposits and ensure your salt chlorinator operates at peak efficiency, providing you with crystal-clear, perfectly sanitized water for years to come. This straightforward maintenance regimen transforms salt cell scaling from a frustrating problem into an effortlessly manageable task, securing the longevity and performance of your valuable pool equipment.

