
Pool Plaster Delamination: Stop Costly Damage
July 24, 2026
Water Bugs: Ultimate Guide to Keeping Your Pool Clean
July 27, 2026
- Recognizing the Need for Pool Light Repair
- Understanding Your Pool Light Fixture
- Quick & Easy Pool Light Repair: Bulb Replacement Steps
- Critical Considerations for Underwater Light Repair
- Conclusion
Pool light repair is a common and often straightforward task that many pool owners will encounter. While a malfunctioning pool light might seem daunting, especially given its underwater placement, the most frequent culprit is simply a burnt-out bulb. Thankfully, a bulb replacement is typically a quick and easy process that you can handle yourself, restoring both the beauty and safety of your swimming haven.
Swimming pools are more than just bodies of water; they are extensions of our homes, offering relaxation, exercise, and entertainment. Well-functioning pool lights are essential for several reasons. Firstly, they significantly enhance safety by illuminating the pool area, preventing falls or accidents during evening swims. Secondly, they extend the usability of your pool, allowing for enjoyable dips long after sunset. Finally, they add a magical ambiance, transforming your backyard into a resort-like retreat with a soft, inviting glow.
Recognizing the Need for Pool Light Repair
Before diving into the fix, it’s important to identify the signs that your pool light needs attention. The most obvious indicator is a light that simply doesn’t turn on. Other signs might include:
Dimming or intermittent light: The bulb might be dying, or there could be a loose connection.
Flickering: Often a precursor to complete failure, or a sign of an unstable connection.
GFCI Tripping: If your Ground Fault Circuit Interrupter (GFCI) breaker consistently trips when you try to turn on the light, it indicates a short circuit, often caused by water leakage into the fixture or a faulty bulb/wiring.
While GFCI tripping can signal a more complex electrical issue, often it’s still linked back to a compromised bulb or a faulty seal allowing water in.
Understanding Your Pool Light Fixture
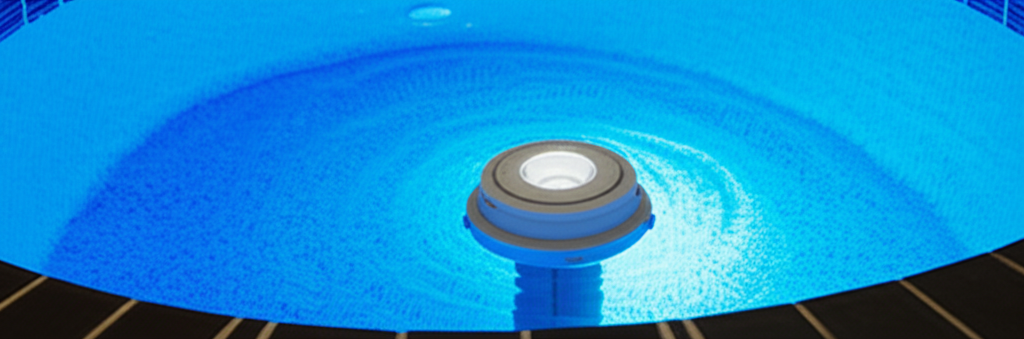
Modern pool lighting offers various options, influencing the type of bulb replacement you’ll need. Older pools typically feature incandescent or halogen bulbs, which are similar in concept to standard household bulbs but designed for underwater use. More contemporary or upgraded systems often utilize LED (Light Emitting Diode) bulbs, known for their energy efficiency, longevity, and often, dynamic color-changing capabilities.
Most pool light fixtures are designed to be serviced without draining the entire pool. They typically consist of a housing unit sealed with a gasket and a face ring, all held in place by one or two screws mounted into a niche in the pool wall. The entire fixture can usually be pulled out of the water, allowing for dry-land maintenance.
Quick & Easy Pool Light Repair: Bulb Replacement Steps
Tackling underwater light repair for a simple bulb change requires a few simple tools and a careful, methodical approach. Safety is paramount, so always start with the power.
1. Safety First: Turn Off the Power!
Locate the circuit breaker for your pool lights in your electrical panel. This is usually labeled “Pool Lights” or similar.
Absolutely ensure the power is OFF. For added safety, you can also trip the GFCI outlet associated with your pool equipment. Never work on pool lighting with the power turned on.
2. Gather Your Tools and Materials:
A screwdriver (usually Phillips head, but check your fixture).
Your new replacement bulb (ensure it matches the voltage, wattage, and base type of your old bulb, especially if upgrading to LED).
A new gasket/seal kit (highly recommended, as the old one can become brittle).
Clean towels or rags.
Wire brush (optional, for cleaning corrosion).
3. Access the Light Fixture:
Locate the single retaining screw (sometimes two) at the top of the light’s face ring, inside the pool.
Carefully loosen this screw using your screwdriver. You don’t need to remove it completely, just enough for the fixture to pivot or detach.
Gently pull the bottom of the light fixture forward and up. The fixture has a long cord that allows you to lift it out of the water and place it on the pool deck. Be careful not to pull too hard or damage the cord.
4. Open and Drain the Fixture:
Once on the deck, tilt the fixture to allow any trapped water inside the lens housing to drain out.
Typically, there are several small screws around the perimeter of the face ring. Use your screwdriver to carefully remove these screws. Keep them in a safe place.
Separate the face ring and the lens from the main housing.
5. Perform the Bulb Replacement:
Unscrew the old bulb from its socket. If it’s stuck, a firm but gentle turn should free it.
Inspect the socket for corrosion. If present, gently clean it with a wire brush or fine-grit sandpaper.
Carefully screw in the new bulb. Avoid touching the glass portion of halogen or incandescent bulbs with bare hands, as oils can cause hot spots and reduce bulb life. Hold it by the base or use a clean cloth.
6. Inspect and Replace the Gasket:
This is a crucial step! The rubber gasket creates a waterproof seal. Over time, it can dry out, crack, or become brittle.
Remove the old gasket and thoroughly clean the groove where it sits in both the lens and the fixture housing.
Install the new gasket, ensuring it sits perfectly flush in its groove. It’s often helpful to lightly lubricate the new gasket with a silicone-based lubricant designed for o-rings to ensure a better seal and prevent pinching. Avoid petroleum-based lubricants as they can degrade rubber.
7. Reassemble and Test:
Carefully place the lens and face ring back onto the housing, ensuring the gasket remains properly seated.
Replace and tighten the small perimeter screws around the face ring. Do not overtighten, as this can crack the lens or strip the plastic. Tighten them in a crisscross pattern to ensure even pressure.
Gently lower the entire fixture back into the pool niche, ensuring the cord isn’t tangled.
Secure the fixture by tightening the retaining screw(s) at the top.
Go back to your breaker panel and turn the power back ON. Turn on your pool lights. If successful, you should have light!
Critical Considerations for Underwater Light Repair
While bulb replacement is generally straightforward, keep these points in mind:
Water Ingress: If you notice water inside the fixture when you open it, it confirms a faulty gasket or a crack in the housing. Always replace the gasket, and inspect for housing cracks.
LED Upgrades: If you’re replacing an incandescent or halogen bulb with an LED, ensure the new LED bulb is specifically designed for your fixture’s voltage (12V or 120V) and base type. LED bulbs offer significant energy savings and last much longer.
Fixture Condition: For older fixtures, inspect the cord for any fraying or cracking, and the housing for severe corrosion. If these issues are present, it might be time for a complete fixture replacement, which might warrant professional assistance.
* Persistent GFCI Tripping: If your GFCI continues to trip even after a successful bulb and gasket replacement, then the issue is likely more complex, possibly involving the wiring, transformer, or the GFCI itself. In this scenario, it’s best to consult a certified pool electrician.
Conclusion
Pool light repair, specifically bulb replacement, is a manageable DIY task for most pool owners. By following these steps carefully and prioritizing safety, you can quickly restore your pool’s illumination, enhancing its aesthetic appeal and ensuring safe enjoyment for years to come. A little preventative maintenance, like regular gasket replacement, goes a long way in preventing future issues and keeping your pool sparkling bright after sunset.